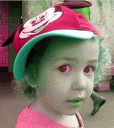
 If you aspire to create your own clip art, you’re not limited to just using graphic elements. As you can see in the gallery below, you also can alter photos to achieve a variety of effects. Don’t know how to use Illustrator or Photoshop? Don’t worry; you don’t need to. You can use the free online Web application Picnik and still achieve professional results.
If you’re unfamiliar with Picnik, you might want to read the previous post detailing how it can help you make your own clip art. In this post, I’m only going to cover how to alter photos. Some of the methods that apply to making clip art from scratch are used with photos, too, so I’ll link to the other tutorial from the word Shapes any time it’s applicable.
1. To begin, you’ll need a photo. If you don’t have any in your personal collection, I suggest downloading one from Stock.Xchng. (See WordPlay’s Stock.Xchng review for the very liberal parameters  surrounding using photos from their site.) Most of the photos below came from StockXchng, and as you can see, the quality is excellent.
Even if you don’t have a great photo to start with, the good thing about using Picnik for making clip art is that you could even turn a bad photo into something beautiful. Another great Picnik feature is that if you’re a Firefox or Internet Explorer user, you can just right-click any photo you find and have it open in Picnik. (Click here for more information.) If you use Stock.Xchng to get your photos, though, I recommend also saving a copy of the photo to your hard drive with its original name. This will allow you to go back to Stock.Xchng later, enter the photo name into the search bar and find the photographer. You can then leave a comment in the photographer’s Comments box with a link to the photo’s location. Not only is this the right thing to do, but some Stock.Xchng photographers make it mandatory if you use their images. But there’s a benefit to you too. Each time you leave a link in a comment, you get a link back to you from Stock.Xchng.
2. Once you have your photo, either right-click and choose the option to edit it in Picnik go to Picnik.com and click the Get started now! button, and then the Upload Photo button. (If you decide you don’t want to use that photo at any time, click the Home navigation tab and you’ll be given the option to delete that photo and upload another.) The photo will automatically open into the Edit screen. Unless you need to make adjustments to your photo (crop, resize, fix red-eye or other edits), click the Create navigation tab.
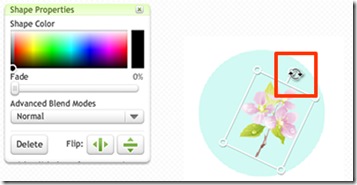
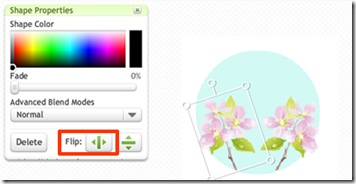
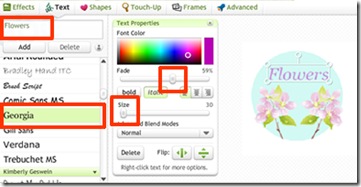
 3. Once in the Create area, the three tabs you’ll use to create the effects shown below will be Effects, Text and Shapes. I went over Text and Shapes in my previous tutorial, but many of the looks below will also require the use of the Effects menu. Fortunately, Picnik has marked each effect clearly, so it’s easy to choose the one you want. If I’m undecided, I often “audition” each effect on a photo until I see something I like. You can find some surprising and wonderful new looks this way. You also can combine effects by saving each one and layering others on top, and making adjustments to each look by using the features within each effect. If you ever don’t like the look you get from Effects or any other Picnik feature, just click the Undo button at the top right of the page to remove it.
4. Once you get the basics of using Effects, I suggest playing with them to become more familiar. There are myriad ways each can be manipulated, which leaves endless possibilities for being creative once you’ve gotten the hang of it.
Visit Picnik
Here are the images I created with Picnik:
Click any of the photos below to see a larger version.
| This photo was altered by using Focal Soften + Tint. Photo by Sias van Schalkwyk _ |
| This photo incorporates a variety of Shapes (bursts and lightning bolts around the edges with vines layered on top and an eagle in the center). Photo by Vector Dapner |
| This photo was altered using Shapes (clouds and eagle) + Heat Map Photo by Dave Schloss _ |
| This photo was altered using Shapes (vines and thought bubble) + Text. Photo from the public domain _ |
| This photo was altered using Boost + HDR-ish. Photo by rubinho 1 _ |
| This photo was altered using Focal Soften + Pencil Sketch + Duo-Tone + Shapes (chunks of squares)
Photo by Taryn Kaiser |
| This photo was altered using Shapes (sourpuss face line drawing) Photo by Ove Tøpfer |


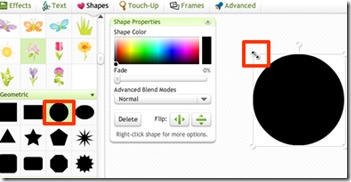
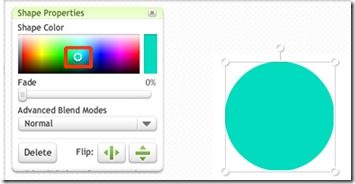
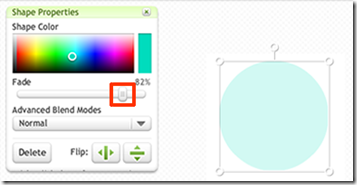



 If the term “HTML hex-code color selector” intimidates you, don’t worry. As you can see from the image to the right, their color selector only requires that you drag icons to the color you want. For me, playing with the colors was part of the fun; there’s just something humorous about a purple and teal sheriff’s badge.
 Anyone who reads this blog knows I’m a collector of
  The easy-to-use Image Chef interface >>


 Free Clip Art Sourcebook
 Image Chef free images generator
 Free photos
 Free clip art
 BeFunky image modification
 Says-It.com badges and seals generators
 I don’t know about you, but it seems like no matter how organized I am about filing my
 When you click on an image, Picasa brings up an interface that lets you modify it in a number of ways. In addition to cropping, straightening, fixing red eye and more basic functions, it also has an effects screen that creates just about any look you want by just selecting the corresponding icon. You can modify your image to be black and white or sepia-tone, or you can change the focus, saturation and tint, put in a graded background and a lot more. This is a great feature for people who want to modify images but don’t have more complex and expensive image modification software.
 Although content really is king, it doesn’t hurt to have your blog look good too. In fact, it can make all the difference in the world when it comes to making readers feel at home.
 As fun as the Uvatar app is to play with, the Cartoonizer would probably have even greater use if you’re trying to create images for your blog. All you need is a good image to start with and the Cartoonizer does the rest.


 We’ve already discussed the importance of having a
 IE: Effects menu /Artist Medium / Cartoon Strip
