Free Clip Art For Your Blog

October 4th, 2013 carlajc Posted in Avatars, Cartoons, Clip Art, Free Clip Art, Free Graphics, Free Images, Free Photos, Photography, Tips and Tools | 6 Comments »

Garden man

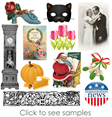
A picture is worth a thousand words. It’s a cliche but it’s also true, which means including images can be a good way to dress up your posts. If you’re like me, though, you hate to look for clip art. I love looking at the images, but I’ve experienced that most free clip art sites are torture to navigate. A clip art hunting session usually involves wading through endless sites that have little art and plenty of ads. This more often than not exhausts me before I even find what I need.

But for you, dear reader, I braved clip art hell to find the best free clip art for your blog. The result is the list below, which contains sites that not only have quality free images but also are easy to navigate (with one exception, noted below). I’ve also included several sites that charge a nominal amount for clip art, in case you can’t find what you need at the free sites.

FREE SOURCES

free clip art samples Free Clip Art Sourcebook

This free e-book is free to download and contains links to thousands of free contemporary and vintage clip art images, photos, craft templates, paper dolls and many other types of images. All the clip art at each link is completely free!

Barack Obama pensive Barack Obama Clip Art

You can find stylized images of Barack Obama on this page, along with generic election and “vote” clip art buttons that can be used for any election, and Democratic and Republican party icons.


Vintage artVintage Art

This resource is close to my heart because it’s WordPlay’s sister blog. I created it because I had a hard time finding free vintage images and assumed others were too. So I bought my own collection of postcards and photos. If you’re looking for authentic vintage art, you’ll like this collection.

Dover art samplesDover Publications

Dover produces high-end clip art, which is available in over 120 books and a few CDs. Fortunately for us, they also offer free samples, which are sent in a link every Wednesday by e-mail. If you’re looking for classy images, Dover is a good place to start. Click here to receive Dover’s weekly samples.


Free-Clip-Art.comFree-Clip-Art.com

This site doesn’t have a giant inventory, but what they have is good. You do have to provide a link to them in return for using their images though. (Read their clipart usage rights for details.) Their art comes in two formats: .wmf and .gif (.wmf format for printing and .gif for blogs, Web sites, e-mail newsletters, etc.).

1clipart_samples #1 Free ClipArt

This site has an uneven mix of image types and drawing quality, but many of the images are worth using. This wouldn’t be my first choice because there are so many ads and the navigation is clunky, but if you can’t find images elsewhere, give this site a try.

_____________

PAID SOURCES

Although we all like getting things free when we can, sometimes you have to pay to get what you want. The following sources provide quality images, yet aren’t too expensive.

iClipart samplesiCLIPART.com

At 6.2 million images and counting, iCLIPART has an amazing collection. Their art is of uniform high quality, which is unusual among clip art sites. For the subscription fee (one year is by far the best deal), you also can access photos, fonts, sounds and Web graphics. This site would be particularly useful for people who want all their images to have the same “vibe,” because although there are some variations, most of the clip art is in the same style.

RetroArt samplesRetroArt.com

RetroArt is great for when you want a retro look and nothing else will do. There’s no neo-retro art on this site; all the images were originally created in the 40’s and 50’s. The drawings are priced individually and range from $4.95 to $14.95, and quantity discounts are available.

______________

clipart.comClipart.com

Clipart.com has over seven million downloadable images (including photos), most of which are of good quality. There are some clunkers, but you can usually find a decent image to illustrate just about any topic. You can download as many images as you want once you’ve paid one of the subscription fees, which start at $14.95 for one week. The site allows you to search for images without paying, so you can find what you’re looking for before you spend any money.

Graphics FactoryGraphics Factory

This site is so affordable, it’s almost free. For only $9.95 a month, you get unlimited access to one million clip art images, animations, Web graphics, photos and fonts. They also have a $59.95 plan, which gives you a full year of downloads._

__________

Animation Factory samplesAnimationFactory.com

If you want access to an assortment of quality animations, Animation Factory offers them at a reasonable price. For only $59.95 a year, you can download as many of their 400,000 animated elements as you want.


You might also be interested in these other resources on WordPlay:

Copyright WordPlayBlog.com


Playing With Words

March 19th, 2013 WordPlay Posted in Grammar, Just For Fun, Vocabulary and Spelling, Writing, Writing Tips and Tools | Comments Off on Playing With Words

playing with wordsIf you enjoy writing, you must like words. The typical English speaker has a vocabulary of around 2,000 words, and those with a university degree may have around 4,000. Still, that’s not an enormous number. William Shakespeare used something like 20,000 words in his writing, but Shakespeare had a dirty secret. He made up thousands of those words himself.

This might sound like a pretty bad idea. After all, words are there to be understood, and if you invent words yourself, how can anyone understand what you mean? Good question, and yet if it worked for Shakespeare, it can work for you. Often Shakespeare turned nouns into verbs, added prefixes or suffixes, joined words together, or borrowed parts of words from elsewhere. He invented words like eyeball, frugal and gossip.

Do you think I’m just confoozling you? Or do you find preconfabricated words hard to understand? Well, ermahgerd!

These days, corporations have whole departments dedicated to making up words (not to be confused with the departments dedicated to making up numbers – that’s Accounts.) Think iPhone. Think Wii. Think Youtube.

It’s all good, clean fun.Inventing new words, like incanderous or fediciously (don’t ask me what they mean) is easy. So why be stuck for the right word again? Just make up one that sounds like the kind of thing you need. And far from dumbing down the language, it opens up opportunities to say something new. I think that must be a good thing, surely?

About the Author
Steve Morris expounds, articulates and wrestles with words and thoughts at Blog Blogger Bloggest.


Content Writing for Other Sites and Blogs

June 13th, 2012 WordPlay Posted in Blogging, Tips and Tools, Writing, Writing Tips and Tools | 3 Comments »

How to be a guest author and content writing consultantWhen you’re creating written content for yourself, it’s pretty easy. It can get hard, though, when you undertake content writing for other people, for other websites or blogs. Writing for someone other than yourself can make you a freelancer, a copywriter, or a ghost writer, or all three of them at the same time. It can also make you just a guest author, which is what I am today and I’m going to tell you how I tend to proceed.

Research about the Subject at Hand
Most of the time, I’m invited to write an article or two. I usually decline if I know nothing about the subject or if it’s going to take me more than a day to research it. On the other hand, if I find the subject interesting, whether it’s for a specific niche or not, I’ll usually go out of my way to create something unique and informative, regardless of how long it takes me to do the research.

Most of what I do is ghostwriting, which means my name and links to anything I do are not attached to the article at all. I’ve written articles for small fees and sometimes for free because it’s someone I know. I prefer guest articles because then I can get a link back, which is usually worth more than any fee.

How to Research
It’s hard to describe, so I’ll use an article about an old movie as an example. The first thing I would do, if I hadn’t seen it, would be to watch it somehow.

The next step would be to glean as much information as possible about it at IMDB and Wikipedia. Plagiarism isn’t my thing and that information is used only to give me ideas on what to focus on.

If there isn’t a lot of information about a specific topic available at well-known sources, I’ll fire up Google and perform a kind of search and destroy mission. The destroy part is when I have to ignore the spammy websites to get to the gold, so to speak.

Rewrites
There are people who are never satisfied. I tend to deal with people like that one time and one time only. If you’re writing to earn a living, it’s one thing. When you’re not, you can be choosy.

Rewriting what you’ve written shouldn’t be an issue if it’s a sentence or two. You should always put yourself in the shoes of the person reading the content and if it doesn’t make sense to you when step away and read it later, it won’t make sense to them either.

If something you’ve written requires a complete rewrite, every time, then you may want to consider writing for yourself only. Not everyone is cut out to be a writer for other people. On the other hand, practice makes perfect if you’re trying to turn it into a freelancing career.

About the Author
RT Cunningham writes for himself at RTCX.NET as well as a few other places. You can find him all over the place if you search for his name using Google. You’ll know it’s him if you see a picture of him and his wife next to the results.


Make Your Own Clip Art Using Photos and Picnik

July 19th, 2008 WordPlay Posted in Blogging, Cartoons, Clip Art, Entertainment, Free Clip Art, Free Graphics, Free Images, Free Online Tools, Free Photos, Just For Fun, Make Your Own Clip Art, Photography, Reviews, Tips and Tools | 7 Comments »

focal-soften-shapes-pencil-sketch-duotone If you aspire to create your own clip art, you’re not limited to just using graphic elements. As you can see in the gallery below, you also can alter photos to achieve a variety of effects. Don’t know how to use Illustrator or Photoshop? Don’t worry; you don’t need to. You can use the free online Web application Picnik and still achieve professional results.

If you’re unfamiliar with Picnik, you might want to read the previous post detailing how it can help you make your own clip art. In this post, I’m only going to cover how to alter photos. Some of the methods that apply to making clip art from scratch are used with photos, too, so I’ll link to the other tutorial from the word Shapes any time it’s applicable.

1. To begin, you’ll need a photo. If you don’t have any in your personal collection, I suggest downloading one from Stock.Xchng. (See WordPlay’s Stock.Xchng review for the very liberal parameters flower-posterizesurrounding using photos from their site.) Most of the photos below came from StockXchng, and as you can see, the quality is excellent.

Even if you don’t have a great photo to start with, the good thing about using Picnik for making clip art is that you could even turn a bad photo into something beautiful. Another great Picnik feature is that if you’re a Firefox or Internet Explorer user, you can just right-click any photo you find and have it open in Picnik. (Click here for more information.) If you use Stock.Xchng to get your photos, though, I recommend also saving a copy of the photo to your hard drive with its original name. This will allow you to go back to Stock.Xchng later, enter the photo name into the search bar and find the photographer. You can then leave a comment in the photographer’s Comments box with a link to the photo’s location. Not only is this the right thing to do, but some Stock.Xchng photographers make it mandatory if you use their images. But there’s a benefit to you too. Each time you leave a link in a comment, you get a link back to you from Stock.Xchng.

2. Once you have your photo, either right-click and choose the option to edit it in Picnik go to Picnik.com and click the Get started now! button, and then the Upload Photo button. (If you decide you don’t want to use that photo at any time, click the Home navigation tab and you’ll be given the option to delete that photo and upload another.) The photo will automatically open into the Edit screen. Unless you need to make adjustments to your photo (crop, resize, fix red-eye or other edits), click the Create navigation tab.

Picnik_effects3. Once in the Create area, the three tabs you’ll use to create the effects shown below will be Effects, Text and Shapes. I went over Text and Shapes in my previous tutorial, but many of the looks below will also require the use of the Effects menu. Fortunately, Picnik has marked each effect clearly, so it’s easy to choose the one you want. If I’m undecided, I often “audition” each effect on a photo until I see something I like. You can find some surprising and wonderful new looks this way. You also can combine effects by saving each one and layering others on top, and making adjustments to each look by using the features within each effect. If you ever don’t like the look you get from Effects or any other Picnik feature, just click the Undo button at the top right of the page to remove it.

4. Once you get the basics of using Effects, I suggest playing with them to become more familiar. There are myriad ways each can be manipulated, which leaves endless possibilities for being creative once you’ve gotten the hang of it.

Visit Picnik

Here are the images I created with Picnik:

Click any of the photos below to see a larger version.

Original Photo Photo Altered with Picnik
1024270_children_of_africa focal-soften-tint
This photo was altered by using Focal Soften + Tint.
Photo by Sias van Schalkwyk
_
1031997_cowboy_sunset cowboy-sunset-create-shapes
This photo incorporates a variety of Shapes (bursts and lightning bolts around the edges with vines layered on top and an eagle in the center).
Photo by Vector Dapner
Schloss_3 lake-heat-map
This photo was altered using Shapes (clouds and eagle) + Heat Map
Photo by Dave Schloss
_
Clark Gable Clark Gable
This photo was altered using Shapes (vines and thought bubble) + Text.
Photo from the public domain
_
1028940_guitar_hero_d boost-HDR
This photo was altered using Boost + HDR-ish.
Photo by rubinho 1
_
1031841_bright_pink_flower_2 focal-soften-shapes-pencil-sketch-duotone
This photo was altered using Focal Soften + Pencil Sketch + Duo-Tone + Shapes (chunks of squares)

Photo by Taryn Kaiser

1036399_strawberries_1 strawberry-create-shapes
This photo was altered using Shapes (sourpuss face line drawing)
Photo by Ove Tøpfer
_
See more clip art made with Picnik:
_
General
Gothic Fantasy Clip Art
Animal Clip Art
Flower Clip Art
Engagement, Bridal Shower and Wedding Clip Art
_
Seasonal
Summer Clip Art
Election Clip Art
Inauguration Clip Art
Holidays
Black and White Halloween Clip Art
Halloween Pumpkin Clip Art
Halloween Masks
Fourth of July Clip Art
Thanksgiving Clip Art
_
Don’t want to spend the time to make your own clip art? Try WordPlay’s collection of quality free clip art sources. Or visit Avatar Central, which lists all our image resources.
_

RevResponse Affiliate Review

July 14th, 2008 WordPlay Posted in Blogging, Free Graphics, Search Engine Optimization, Tips and Tools | 6 Comments »

Want to start making money right away?
Check out RevResponse

Internet money_small There are few bloggers who aren’t interested in monetizing their blogs. After all, you probably spend a lot of time pouring forth your wisdom and a significant piece of yourself onto those digital pages. And if you’re a WordPlay reader, you also might spend at least a little time working with clip art and photos to make your blog look attractive. I know from experience that all those things take a lot of effort.

Personally, my strategy has been to take these steps: build my blog content and image, thoroughly understand search engine optimization, achieve stable Google rankings and then monetize. That’s why you’ve rarely seen ads on this blog. I’ve experimented briefly with various programs, but I’m just now dipping my toe into the waters of real monetization.

One of the methods I’ve identified for WordPlay is RevResponse, which I already use on my editorial consulting Web site. What is RevResponse? It’s a classy, painless way to be paid for generating leads for a variety of quality publications, white papers, etc. And RevResponse actually adds value to your blog by providing free information to your readers. I particularly like that aspect, because WordPlay is all about enhancing content.

RevResponseRevResponse is unique because it helps you promote their information sources by creating a custom mini-site with graphics that match your blog or Web site. In my case, they created the site to match my business Web site. (Click the image to the right to see a live sample page.) I can link to the mini-site in any way I want, which gives me the flexibility to place links to it where they fit best. RevResponse helps out in this respect by offering a Promotion Wizard that lets you create graphic ads that rotate links to publications relevant to your niche. Or you can create your own text links. You can see an example of links I created if you look in the upper left corner of WordPlay’s sidebar.

Another great thing about the program is the quality of the products; they represent only the cream of the crop. For example, you can get paid to refer people to Website Magazine, which is free for subscribers. As one of their subscribers, I can vouch for its quality. I’ve learned a lot from reading it. There also are many other publications, such as eWeek, a guide to e-commerce technology, and the Vulnerability Management e-book, which helps you understand how to protect your Web properties in the sometimes hostile world of the Internet. (This is a subject close to my heart, since I just discovered there was cross-site scripting, also known as XSS or malicious code, in all four of the free WordPress templates I use for my blogs. I learned to spot the code and remove it, and I highly recommend that you educate yourself so you can do the same.)

The only caveat about working with RevResponse is that your blog or Web site must qualify for the program. To do so, you have to have an audience that would be interested in what they have to offer. To see if you qualify, click on this page and look at the sidebar to determine whether the information categories fit your blog or Web site. If it looks like they might be a good fit for RevResponse, click here to apply.

If you apply and your blog or Web site isn’t appropriate, RevResponse let you know! But that’s a good thing. Even though the time needed to implement the program is fairly minimal, you don’t want to to spend any time at all if it’s not going to produce revenue. And if you are accepted into the program, you’ll be glad they’re a little picky. That means the other affiliates in the network will be quality Web properties like yours, rather than spam blogs or sites.

See RevResponse in action

You might also be interested in these related articles:


Search Engine Optimization 101

July 9th, 2008 WordPlay Posted in Blogging, Search Engine Optimization | 6 Comments »

Brown Bear, the largest land carnivoran next t...Image via Wikipedia

The title of this post is actually a misnomer. Search engine optimization (SEO) — the art and science of getting your site or blog ranked in search engines — can’t be covered in one post.

Those who truly seek to understand and implement SEO know it takes study, a time investment and even some experimentation to achieve good results. It also helps if you can follow the advice of someone who has already achieved that success. Actually, that can make all the difference in the world.

When I began this blog, I had no idea what I was doing. I made every mistake in the book, SEO-wise. And I thought I didn’t care whether I got traffic, because I created WordPlay as a showcase for my editorial consulting business. I just wanted a blog that looked somewhat pretty and had interesting content that I could link to my company Web site. But then I made a few tweaks that brought me more traffic. Before long I was hooked on hits.

I made those traffic-drawing tweaks because of a kind soul who actively prodded me to do so: Grizzly Brears of Make Money Online with Griz. As I followed his advice, I watched my hits go up and my whole online experience changed. Now I have numerous blogs that rank well for popular keywords I never thought I could achieve rankings for.

There’s a lot to be said for watching your hits grow; I highly recommend it for increasing your self-esteem. To achieve those results, however, I had to begin at the beginning. And it took some work; I won’t kid you about that. For me, most of the work was between my ears. I needed to change my thinking in order to change my results. That led me to read everything Grizzly had to say on SEO. Now I put myself in the “doing quite well, but still learning” category. I think Grizzly might say he’s still learning in some areas, too, because things change all the time online. The difference is, while he’s learning, he’s cashing AdSense checks in excess of $11,000 a month.

As I said before, you can’t cover everything needed to achieve Grizzly-sized online success in one post. But you can begin at the beginning and work toward that goal. I can almost guarantee your head will hurt and you’ll get confused, but keep going. Many of your questions will be answered in subsequent posts or in the comments fields.

After everything I’ve just written, you might be thinking, why write an entire post on SEO and not give one bit of SEO information? What a cheat! Well, not really. It’s not my niche to teach SEO, yet I know it is of great concern to my readers. The best favor I could do is to refer you to someone who can give you exactly what you need.

Friends of Grizzly and WordPlay:

You might also be interested in these related posts on WordPlay:

Reblog this post [with Zemanta]

Make Your Own Free Clip Art with Picnik

May 23rd, 2008 WordPlay Posted in Clip Art, Free Clip Art, Free Graphics, Free Images, Free Online Tools, Just For Fun, Make Your Own Clip Art, Tips and Tools | 23 Comments »

imageAs you can probably tell by now, I’m a little obsessed with free clip art. In the past I’ve written about other free graphics programs that can help you turn photos into clip art and do other fun things like make multi-purpose labels and Christmas cards, or create your own cartoons. But I think I might have found the most versatile free tool yet in Picnik. Not only can you alter photos with it, but you also can use their extensive selection of free graphics to make professional quality clip art. Here are some examples of clip art images I created in Picnik in just one afternoon:

clip_art_american_flag clip_art_bird clip_art_heart free_clip_art_happy_birthday
clip_art_pink_ribbon clip_art_butterflies clip_art_vote_2008 clip_art_spring_wreath

Click on the images above to see larger versions. Click here to see more samples of clip art made with Picnik. Also, see our 2008 election clip art made with Picnik.

To make images like these and many others, just follow these simple instructions:

1. To make your own free graphics, you need a file like this one, which is just a 200 pixel x 200 pixel square or this one, which is a 200 pixel x 400 pixel rectangle. Both have white backgrounds. (Because of the backgrounds, these files will seem invisible when you click on them. To download, put your mouse in the upper left corner of the resulting blank screen.) Feel free to use either of these or make your own blanks of any size in Photoshop, Fireworks or any other image program. The reason you begin with a blank slate, so to speak, is because Picnik requires that you upload a file to alter. Most people use Picnik to alter photos, but since you’re going to make your own clip art, you’ll need a white background. You also could use a colored background but for the sake of simplicity, let’s stick to white for now.

2. Once you’ve downloaded a blank .jpg onto your hard drive or created your own, go to Picnik.com and click the “Get Started Now” button.

3. Once inside the program, click the “Upload Photo” button and choose the blank file from your hard drive. When your file has been uploaded into Picnik, you will see it (although barely, because it’s a white image on an almost-white background) in an interface that has five tabs across the top. Choose the “Create” tab.

Picnik_clip_art_size 4. Once inside the “Create” tab, the button you will use the most will be “Shapes.” (If you want to add text to your clip art, you’ll also eventually want to use the “Text” button too.) To begin designing your own clip art, choose “Shapes” and then scroll to see all the available images on the left. Keep in mind that all the images in black can be altered to appear in any color, so at this point all you’ll care about is choosing a shape. Click on an image to insert the shape onto your white “canvas” .jpg, then drag the corner with your mouse to make it the size you want. (See the image above.)

5. There are a variety of Picnik features you can use to alter your clip art. They require a little getting used to, but once you’re familiar, you’ll probably love playing with them. Here are some of the main features:

Picnik_clip_art_adjust_color
Change colors by moving the white circle that appears on the color spectrum.
picnik clip art adjust fade
“Fade” the color by sliding the Fade bar. This not only mutes the color, it allows it to “float” over other colors and create layers. (See the butterflies and bird clip art above for examples.)
Picnik_clip_art_rotate
You can insert an image on top of another image (in this case, a flower on top of a circle) and then rotate it. To rotate, hover your mouse over the circle that sticks out at the top of the image. When a circle with two arrows appears, move your mouse to rotate the image in the direction you want it to turn.
Picnik_clip_art_flip
To create a mirror image, as I did with the flower above, just add another flower, then click the “Flip” button on the left. You can also flip vertically by clicking the “Flip ” button on the right.
Picnik_clip_art_text
To add text to your image, click the “Text” button at the top of the “Create” screen, then type in the word(s) you want. Then, choose a typeface by clicking on it and size the type by sliding the “Size” bar. You can also fade the text color by sliding the “Fade” bar. If you want your text to appear on two or more rows, you’ll have to go through this process separately for each row.

Once you’re done playing, click the “Save & Share” tab to save, e-mail or post your masterpiece to any number of locations, such as Flickr, MySpace, Facebook or even your own Web site.

If you experiment with the features shown above, you can create some amazing things. And if you need software to edit photos, Picnik can perform that function as well. But that’s a subject for another post!

* Visit Picnik *

See more clip art made with Picnik:
_
General
Gothic fantasy clip art
Animal Clip Art
Flower Clip Art
Engagement, Bridal Shower and Wedding Clip Art
_
Seasonal
Summer Clip Art
Election Clip Art
Inauguration Clip Art
Holidays
Black and White Halloween Clip Art
Halloween Pumpkin Clip Art
Halloween Masks
Fourth of July Clip Art
Thanksgiving Clip Art
Christmas Images
_
_
Don’t want to spend the time to make your own clip art? Try WordPlay’s collection of quality free clip art sources. Or visit Avatar Central, which lists all our image resources.

Web Content: Tips for Getting Something on the Page

May 12th, 2008 WordPlay Posted in Blogging, Cartoons, Clip Art, Free Clip Art, Free Images, Free Photos, Tips and Tools, Writing, Writing Tips and Tools | 7 Comments »

blank papersI’ve been conducting research and compiling images for a comprehensive review of a great free online imaging tool. But you’re not going to read about that now, because I woke up with a cold. Instead, I’m going to refer you to some tips for getting something on the page on the days when the content just ain’t happening.

Tip #1
Create a resource list using other people’s work. This post is an example. I found some posts that address finding inspiration for blog articles and voila ! Instant blog post.

Tip #2
Scan this exhaustive (and when you have a cold, exhausting) content resources list from Lorelle on WordPress that will surely have an idea or 10 that will point you in the right direction for content creation.

Tip #3
Check out these 18 types of blog posts from Darryn at ProBlogger. One of these ideas might jar your thinking process a bit so you can come up with something new.

Tip #4
Use Zemanta. If you have a self-hosted WordPress blog and you don’t already use Zemanta, you might want to start. Once it’s installed, simply go to the editing area of one of your old posts you think might be expandable (preferably a long one so Zemanta will have a good idea of the subject) and see which articles Zemanta recommends. One of these might inspire a new idea or give you stories to link to for your very own post like this one: a resources list. Read our Zemanta review for more information about how it works.

Tip #5
Use social networking sites to see what’s hot. You can get a quick idea of the latest buzz by seeing what everyone else is writing about. If you write book reviews on your blog, check out social networking sites devoted exclusively to book lovers.

As always, it’s a good idea to make things look pretty by using images in your posts. Images can also do wonders if you don’t have time to write a lot. You can use Zemanta for this. But if Zemanta doesn’t have what you need, see our free clip art collection, free cartoons or Stock.Xchng review for links to lots of quality free images. (The image in this post is from B S K of Stock.Xchng.)

I hope this resource list helps you stay on top of your content!

If you’re interested in relevant anchor text links for your content, visit R.T. Cunningham’s ConnectContent.


Mother’s Day Gifts for Moms Who Blog

April 8th, 2008 WordPlay Posted in Gift Guide, Photography, Writing, Writing Tips and Tools | 7 Comments »

Need a last-minute gift or card for a Mom?
Check out these free Mother’s Day certificates and free printable vintage Mother’s Day cards.

_______________________________________________________________

As we know, bloggers are a special breed who work hard. How moms who blog actually pull off caring for children at the same time, I have no idea. My hat’s off to them. To honor the fact that they live double lives so effectively, here’s a guide to Mothers Day gifts for moms who blog. The products range in price and type; some are serious, some are silly. But any of these gifts will allow you to support her creative passions this Mother’s Day!

MOTHER’S DAY GIFT GUIDE

Verilux lamp 
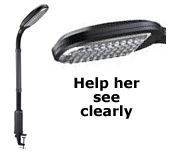
Verilux Natural Spectrum Deluxe Clamp Lamp
This is the perfect gift for a mom with bleary eyes from spending too much time at the computer. The lamp can be clamped on a desk or monitor to allow the simulated natural sunlight to illuminate her workspace, reducing eye strain and making the whole world look sunnier.


ORDER Verilux lamp _________________________________________________________________

Chicago Manual of Style The Chicago Manual of Style
This is the quintessential resource for sticklers who want to get every detail right. Originally created to establish editorial standards for writers of academic works, the scope of its recommendations now cover the world of cyberspace — which makes it perfect for blogging moms!

ORDER The Chicago Manual of Style

_________________________________________________________________

Eats, Shoots and Leaves Eats, Shoots & Leaves
This hilarious book is like Mary Poppins’ proverbial spoonful of sugar that helps the plea for better punctuation to go down. Combining a joking militarism about correct punctuation usage with a great sense of humor, Lynn Truss educates while she entertains.


ORDER Eats, Shoots & Leaves
_________________________________________________________________

Canon cameraCanon PowerShot A590IS 8MP Digital Camera with 4x Optical Image Stabilized Zoom
Whether she wants to capture the kids in action or create photos for blogging, this is the perfect gift. A serious camera at an affordable price, its easy operation allows even moms who know nothing about photography to take great pictures.

ORDER the Canon Powershot
_________________________________________________________________

The Elements of StyleThe Elements of Style
This skinny little volume covers the basics every writer needs to know. In fact, many writers read it once or twice a year, just to brush up. If you know a mom who blogs and doesn’t have this book, you might want to do her a big favor and get it for her.


ORDER The Elements of Style

So there you have it; some lovely gifts I’m sure the blogging moms in your life would be happy to get.

Don’t forget, Mother’s Day is coming up quickly, so order soon!

And if Mother’s Day puts you in the mood for a good film, here’s a list of 10 movies about moms you might like. Also, if you’d like to make a free vintage art card for Mother’s Day, visit Vintage Holiday Crafts.

Tags: , , , ,


Zemanta Delivers Free Graphics, Keywords and More to Your Browser

March 29th, 2008 WordPlay Posted in Blogging, Free Graphics, Free Images, Free Online Tools, Free Photos, Free Software, Reviews, Tips and Tools, Writing Tips and Tools | 6 Comments »

Zemanta GalleryI recently read about Zemanta’s ability to deliver free graphics and other resources right to your browser and thought, yeah, that might be cool. But then I saw it in action and I truly got excited.

For those who haven’t heard about it, Zemanta is a plugin for Mozilla Firefox 2 and 3 that can be used with WordPress.org, Blogger or Typepad. (This is yet another reason to use the vastly superior Firefox browser. A version of Zemanta also is in the works for Internet Explorer though. You can e-mail Zemanta at info [@] zemanta.com if you’d like to become an IE beta tester.)

What exactly does Zemanta do? Well, it’s hard to condense into a few words. I’ve seen it described as a “content suggestion engine” and a “semantic layer” but I think it’s best to let the folks at Zemanta explain their virtues themselves in this excerpt from their Web site:

* Pleasure: It’s fun to see your words paired with great links and pix
* Content: Pictures, links, articles and tags
* Convenience: No more trolling the web for content for your posts
* Traffic: Links to recent blog posts frequently result in return traffic

Still don’t know what the heck it is? Check out the photos below that show Zemanta in action. I took these screen shots this morning as I prepared a post for my movie trivia blog, Tricky Movie Trivia. I figured, why not go for some shameless self-promotion while I try to enlighten you about this cool new plugin?

So, here we go:

Zemanta places an interface to the right of the window where you enter your blog post. In this interface is a gallery of photos that are either in the public domain or are tagged as “Non-free, could qualify as fair use.” The former option leaves it up to you to check on usage permissions.

Zemanta sample 2

The more you write, the more Zemanta tweaks its image offerings to match your copy. In my case, the more I wrote about Bette Davis and All About Eve, the more photos of both I was shown as options.

There were some great photos, but in the end I opted for one that wouldn’t have been my first choice because it was the only one in the public domain. All I had to do to select it was click on it and Zemanta immediately placed it in the upper right corner of my post with the photo source (Wikipedia) underneath it. This feature alone made me fall in love with Zemanta. I use graphics/photos in my posts all the time and I’ve never known how to get the image credits positioned underneath them without creating a table.

There are, however, several minor negative aspects to the photo feature. One is that you can only use one image. If you try to insert a second image, no matter where you place your cursor Zemanta always erases the first photo you inserted and replaces it with the new one. The other downside is that you have no way to control which nine images are offered up.

In the case of All About Eve, I was lucky because that subject lent itself to photography. While writing this post, however, I got an odd assortment of images that kept changing as I wrote. I started with six photos of Bette Davis, screen shots of the Blogger and WordPress login pages, and a very large Internet Explorer icon. By the time I was done, I had one Bette Davis photo, Firefox and IE logos, and screen shots of various Web pages having to do with random subjects in this story. But Zemanta is new and expanding, so I expect to see the selection widen with time. And how can I complain anyway? I was able to find an appropriate photo for my movie review without even opening another browser window. As a bonus, I also found an image for another Bette Davis movie I had already reviewed.

Related articles

Zemanta also presented a list of related articles in its “Articles” section, which is situated underneath the photo “Gallery.” Although I didn’t opt to use one in my All About Eve post, I did choose an article for this post from about Zemanta from techcrunch.com, which you can see at the bottom of the page. Like the photo described above, the article link and its surrounding border and text were inserted with one click.

Links and keywords

Zemanta also presents “Links” and “Tags” suggestions underneath the post. Similar to the related articles links in the “Articles”section, if you click on any of the words Zemanta presents in the “Links” section, the words will automatically be linked to the source from your blog post. For the movie review, the resources were Wikipedia and the Internet Movie Database, but I understand from the Zemanta FAQ that these resources will be greatly expanded in the future, along with the photo sources.

Zemanta sample 3

In the “Tags” section, keywords were suggested. I found this helpful, as I hadn’t considered some of those that were listed. Although you obviously can’t see the impact Zemanta had on my blog’s keywords in the screen shot of the final post below, and I didn’t use any of their text links, you can see the tidy way in which the source was placed under the photo. In my opinion, it gives the post a professional look. Even better, it was incredibly simple to do.

Tricky Movie Trivia

Additional notes

Zemanta places a small icon at the bottom of any post that has been “Zemified” but you can remove it if you’d like. Personally, I found their plugin to be so helpful, I don’t mind giving them credit.

To read their FAQ, which explains more about where Zemanta gets its resources and how it plans to expand the service in the future, click here.

To download Zemanta, click here.

You might also be interested in these other resources on WordPlay: